
Skip to content
Cabinet Math

How it works

Set it up once. Reuse it on every job.

Step 1

Set up how you build

Start from a face-frame or frameless template and adjust it: reveals, gaps, overlays, groove depths, joinery. You only do this once.

  • Face-frame and frameless templates to start from
  • Settings that don't work together aren't offered
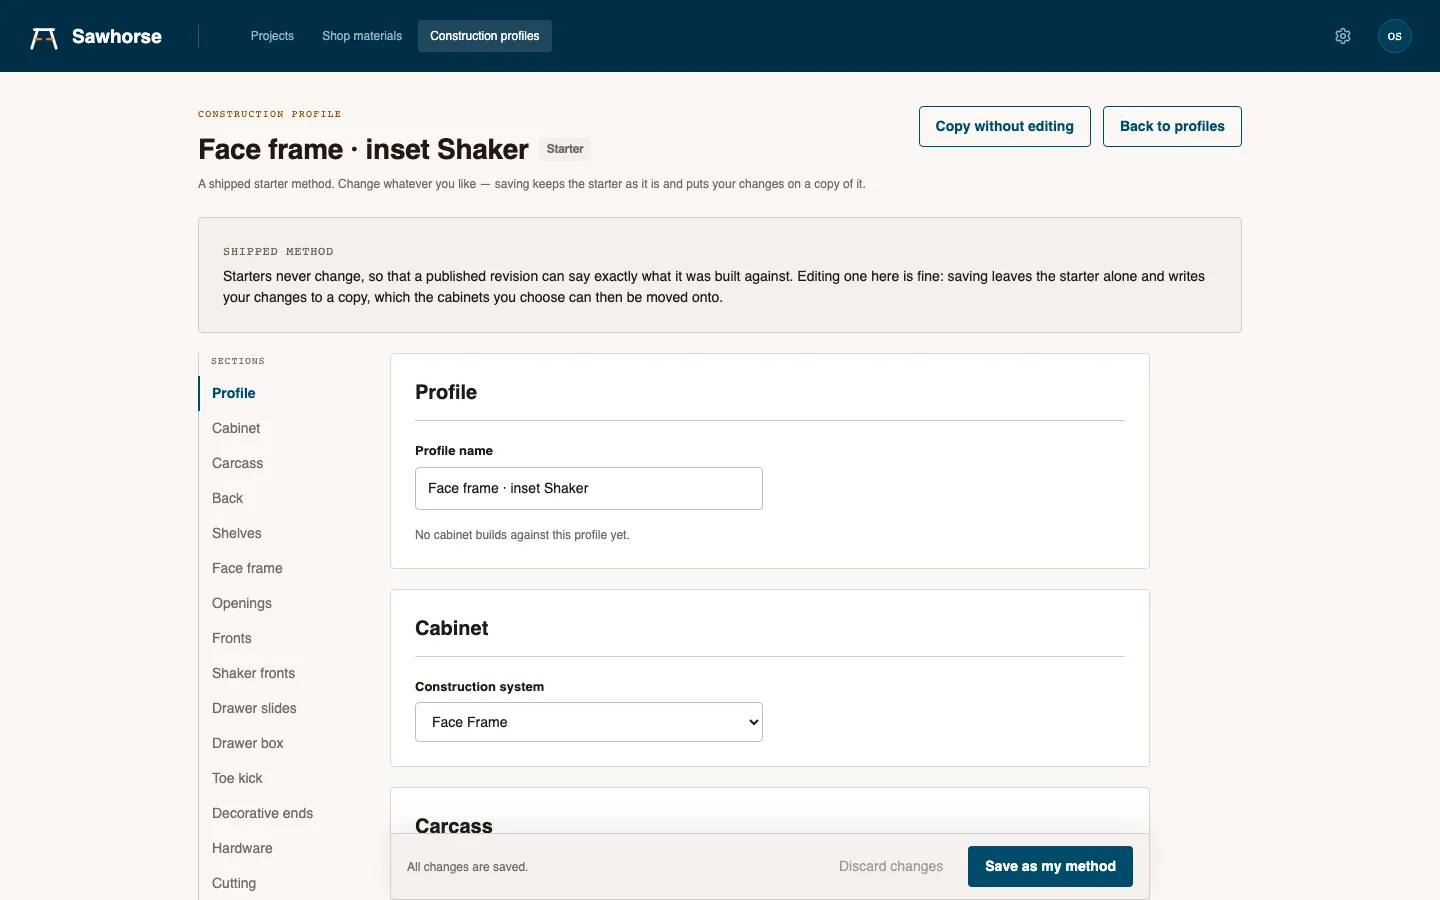
The construction profile editor for a starter profile named “Face frame · inset Shaker”. A note explains that starters never change, so editing one saves the changes to a copy. A section rail lists Profile, Cabinet, Carcass, Back, Shelves, Face frame, Openings, Fronts, Shaker fronts, Drawer slides, Drawer box, Toe kick, Decorative ends, Hardware and Cutting.
A starter template's settings. Edits save to your own copy.
Step 2

Lay out the cabinet

Enter the overall size, then lay out the front with drawers, doors and open shelves. The 3D preview updates as you type. If something can't be built, it tells you why.

  • Overall sizes include end panels; the box is worked out for you
  • Bad input names the field and the limit
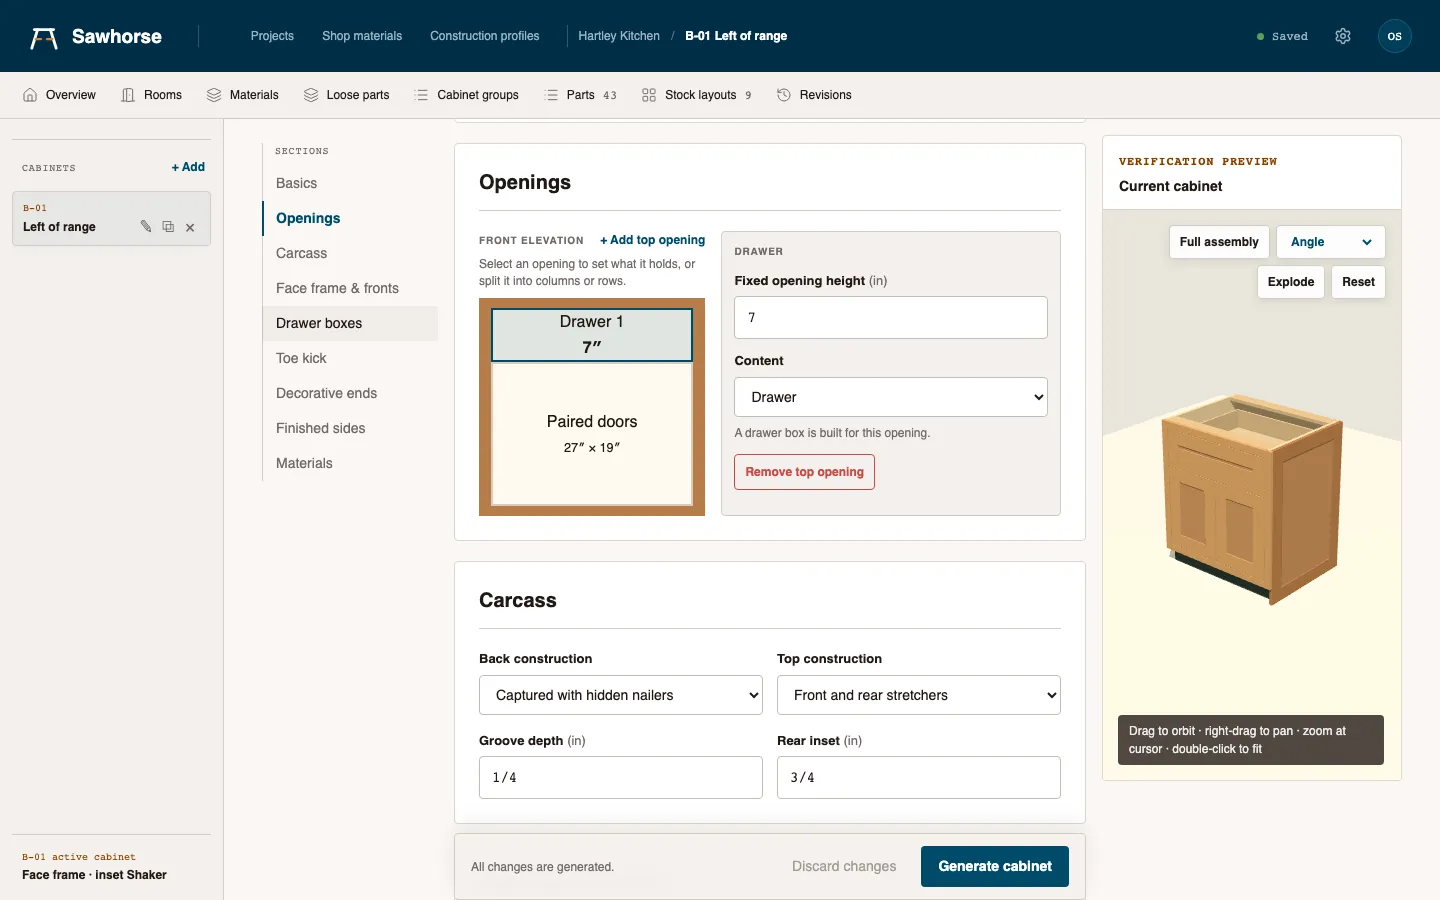
The cabinet editor. A section rail lists Basics, Openings, Carcass, Face frame and fronts, Drawer boxes, Toe kick, Decorative ends, Finished sides and Materials. The Openings section shows a front elevation with a 7 inch drawer above a 27 by 19 inch paired-door opening, and a live 3D verification preview of the cabinet on the right.
Laying out a cabinet's front, with the live preview.
Step 3

Check it

Spin the model, explode it, click a part. You'll see its finished size, cut size, material, and how each dimension was worked out.

  • Explode, filter, and zoom without losing your view
  • Select a part in 3D and it's highlighted in the cut list and on its sheet
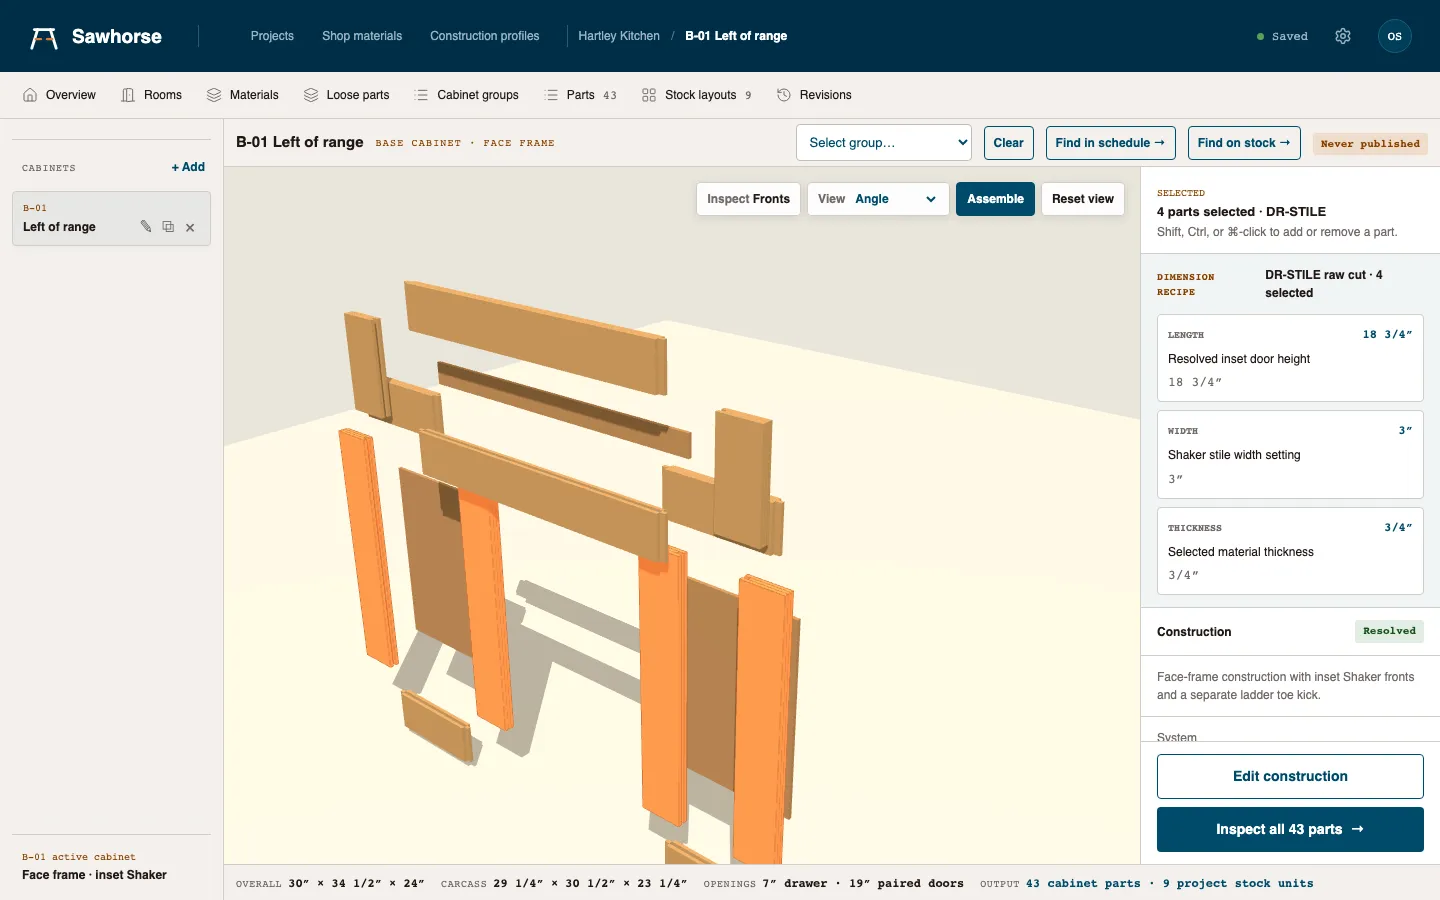
The Cabinet Math cabinet workspace with a face-frame base cabinet exploded into its separate parts in 3D. Four selected door stiles are highlighted in orange. A right-hand panel headed “Dimension recipe” gives the selected stile's length as 18 3/4 inches from the resolved inset door height, its width as 3 inches from the Shaker stile width setting, and its thickness as 3/4 inch from the selected material.
The cabinet exploded, with four parts selected.
Step 4

Cut it

Publish a revision, then print the PDF or export a CSV. Change something later and every list updates together.

  • Each revision saves the cut list, layouts and drawings together
  • You'll know if the design has changed since you published
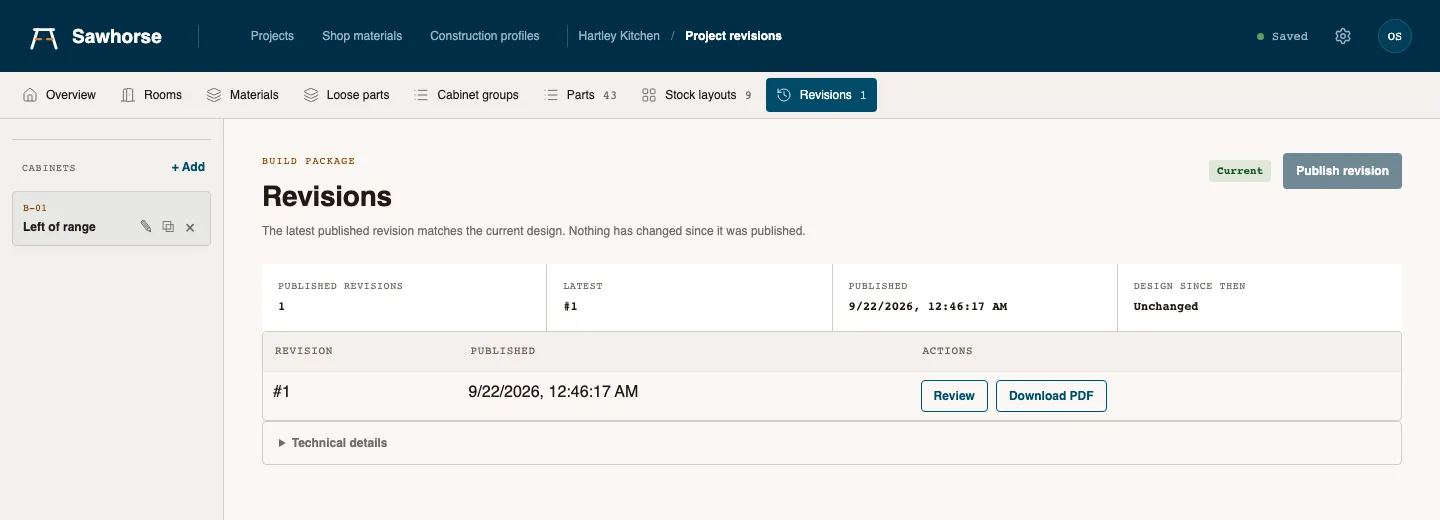
The build package revisions page. The latest published revision matches the current design, marked with a green “Current” status chip. Revision #1 lists its publication timestamp with actions to review it or download its PDF.
A published revision that still matches the design.

Start with how you already build.

Pick a cabinet you've already built, set it up in Cabinet Math, and check the cut list against the real thing.